SimVimX plugin and Firmware Installation
Plugin Installation: add the SimVimX plugin to your X-Plane as any other plugin. Just extract the SimVimX zip file as-is to X-Plane's "Resources/plugins" folder. The new menu item “SimVimX” will appear in X-Plane's Plugins menu. Supported systems: Linux, Windows, OSX.

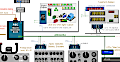
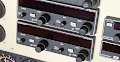
The status window shows the connected SimVimPanel instrument modules and connection status (you have to select to show the Status window):

Download - (please use the latest versions to avoid problems with your working configuration).
The latest database file (SimVimX.dat) is always included in the plugin archive, but note that it can be updated frequently, even if the main SimVimX plugin has not been updated to a new version. Always replace older SimVimX.dat file in the plugin folder with the latest one. It includes all predefined parameters, the "embedded" conversion data for some planes, name auto-correction list (to replace old parameter names with new ones), etc.
| Current SimVimX version (Plugin and database file), all systems |
SimVimX Plugin - v2.19 |
14 Aug. 2023 |
| Latest database file (can be included in the plugin archive above) |
SimVimX.dat |
20 Oct. 2023 |
| Experimental plugin for Apple Silicon (aarch64-macos) |
SimVimX Plugin - aarch64-macos beta |
|
| Latest changes overview |
Full Versions History |
|
|
Note: X-Plane 12 Mac users with Apple Silicon processors can use the beta plugin archive for aarch64-macos above. Requires additional files from the main archive. Currently does not check for updates online.
Plugin Update: Extract the new SimVimX zip file as-is to the X-Plane plugins folder and confirm the files replacement. Don't delete anything from the SimVimX plugins folder before update, as it contains your created data.cfg file and the devices.prf file that keep all configuration and settings! Note: if you have the older vesrion in the "SimVim or HCSCI" folder, delete that folder (or you can extract the new SimVimX version to that folder and then rename it to "SimVimX")
- 20 Oct: SimVimX Firmware is updated to the v.55 - fixed a bug with the 7-segment gisplays initialization in certain configurations
|
SimVimX Firmware
The SimVimX firmware is a heavily optimized program code, written from scratch (without using third-party Arduino libraries) to handle a large number of inputs, synchronize data control for a large number of different input/output devices, exchange data between plugin and “slave” boards.
The system is designed to work only with SimVimX plugin. The latest stable firmware is usually included in the plugin. The SimVimX Firmware needs to be uploaded only once, directly from the SimVimX plugin menu at the first time, or automatically on updates, as described below.
Also, the latest or beta Firmware versions can be provided on the Patreon (or Boosty) blog as SimVimX.dat file that regular subscribers can download and place it to the SimVimX plugin folder after that it will be uploaded automatically. Without this file the in-built firmware will be used.
You can see the firmware version on every connected LCD after the config initialization in the second line.
| >> Latest changes, description |
Database file / firmware (SimVimX.dat + plane conversions) |
- Firmware v.50
- Slave LCD board brightness control corrected (if you use pin A5 for the LCD backlight)
- Fixed: 7-segment displays were not reset and turned off if an LCD slave board was used.
- Added and corrected some controls in the fire panel for Zibo B737 conversion.
- Firmware v.51
- The LCD backlight on the slave board (A5 output) is turned off when you quit X-Plane, the same as all 7-segment displays and LED drivers.
Also, this mode is activated when there is no data exchange with the SimVimX plugin for more than 1 minute..
- Added and corrected some controls for the King Air C90 (EVO) conversion.
- 28 April:
- Corrected some lights control for Zibo B737 conversion (wheel, L/R ldg lights).
- Fixed and added all needed controls for ADF in Zibo B737 conversion (display format, modes, indication.
- 25 May:
- Corrected firmware, fixed multiplexed 7-segment display initialization, eliminating the problems with using more than one output multiplexer for 7-segment displays (and LED drivers).
- 27 May:
- Added annunciators and corrected some controls for the King Air C90 (EVO mod) conversion.
|
Fresh (first time) Firmware upload
On successful connection you will see the messages "Master Board: Connected (USB/LAN)" and "Configured: 1 Input, 1 Output"
This means your board is working correctly, and you can start wiring all input controls and output devices to the controller and use the Configuration tool to assign all of them, but before you can run a simple test to make sure:
- Load some standard X-Plane aircraft (Cessna or Baron 58). Connect a toggle switch to pin #5 / GND and flip it on/off.
- The on-screen Pitot switch will change its position accordingly with your real switch. The on-board LED on the master board will change its state (Pitot Heat is on/off).
Connection, notes
- If you have changed the configuration "data.cfg" file while X-Plane is running, just click the "Reload Config" button in the Status window.
- The plugin should always establish connection automatically every time X-Plane is started, no matter how many times you have done it.
- If you use Ethernet firmware instead of USB you don't need USB cable to be connected until you will need to upload a new firmware version.
- Note for Linux users: Some Linux distributions do not grant the user access to serial ports by default. In this case you need to add your user name to the "dialout" group.
Firmware Auto-Update
The plugin checks the currently used firmware version on connection, and if it needs updating (the new stable firmwre is included to the plugin or plugin finds a beta SimVimX file in the plugin folder), the program uploads the new firmware to the board and then establishes connection. There's nothing more for you to do for the serial USB version.
- For Ethernet version you need to connect your master board to USB (or reconnect it) and click "Upload" - just like during the first upload.